Terraform deploy pipeline in Azure DevOps for sure will be great for infrastructure creation and priceless if you need to define many environments.
As always in my blog, if you know how to set up an azure pipeline for terraform but need sources, you can grab them from here!
But if you want to learn how to do this, read the below article.
So to configure Azure Pipeline for terraform you must:
- Create Service Principal and add permission – in short, this is the user which terraform uses to create resources
- Create Storage Account for terraform state saving
- Install extensions for Azure DevOps – addons help with terraform installation and usage
- Set parameters for pipeline and terraform
- Created pipeline using yml files from my repo on GitHub
Create Service Principal and add permission
To create a service principal you run the below command:
az ad sp create-for-rbac --name api://terraformspn --role Contributor --scopes /subscriptions/##SUBSCRIPTION_ID##Please save the result, especially the password.
Create Storage Account for terraform state saving
When you use Azure Pipeline you must save terraform state in the shared resource. In Azure, the best place is Azure Storage, the name of the storage account doesn’t matter. You must create one and also create a container, look how it looks in my case:
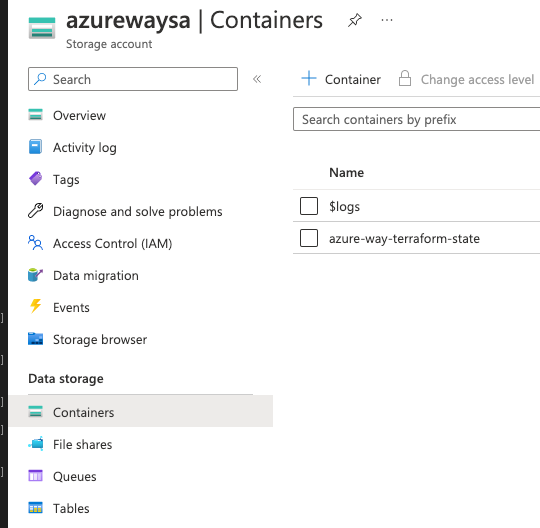
Inside azure-way-terraform-state container, terraform will save the state file.
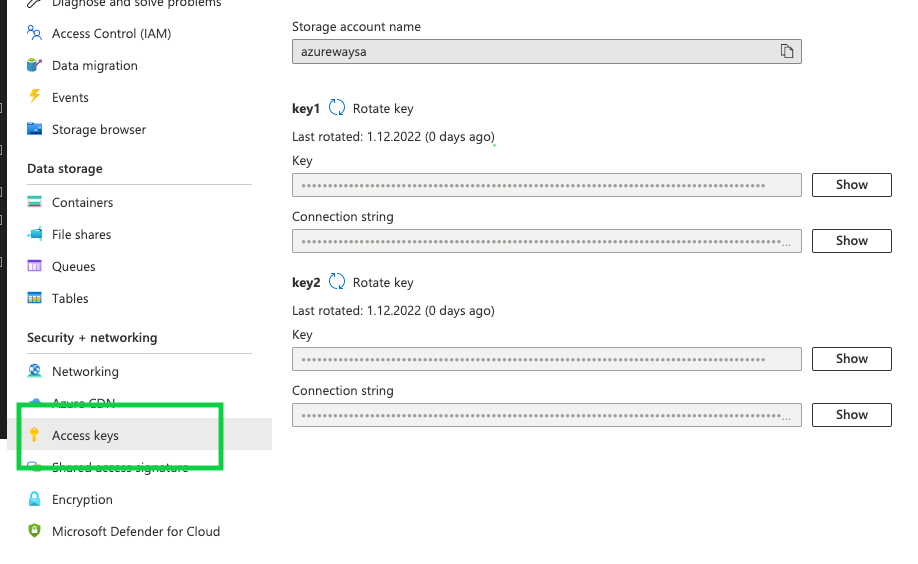
You must also copy the Access key for a storage account, it’s placed in the left-hand side:
Install extension for Azure DevOps
In my solution, I’m using an extension for terraform:
- Terraform from Microsoft DevLabs – you can download it here
Set parameters for pipeline and terraform
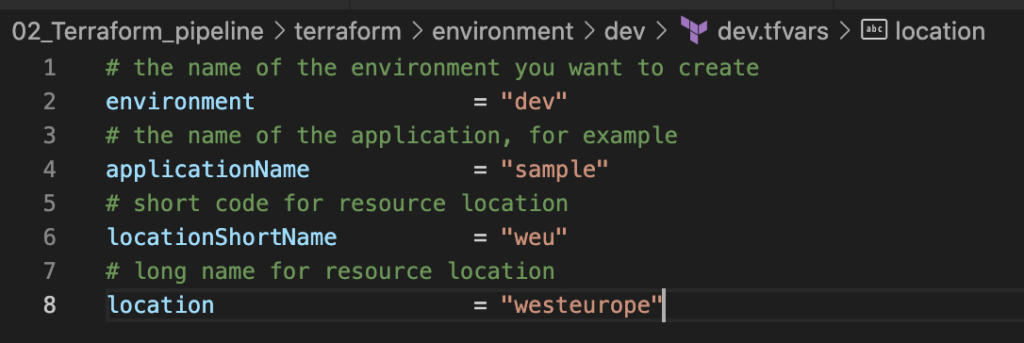
In order to set parameters for terraform, you must open file: 02_Terraform_pipeline/terraform/environment/dev/dev.tfvars and set values for defined variables:
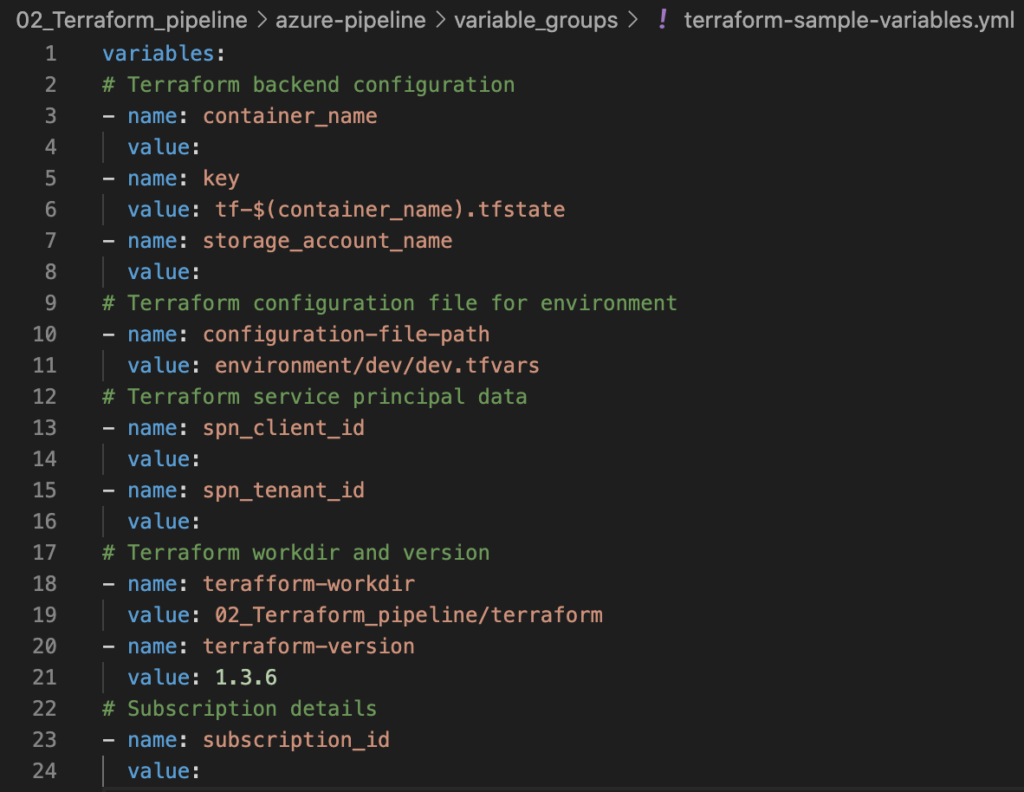
In the next step we must define variables for terraform pipeline, open file: 02_Terraform_pipeline/azure-pipeline/variable_groups/terraform-sample-variables.yml and set values define variables:
As we cannot add an access key for the storage account and Service Principal to the text file, this is not safe, everyone who has access to the repository could use these values. In order to have better security, we need to add these settings to Variable Groups in Azure DevOps. Remember to add this value as secrets, then:
- You cannot retrieve the value of this parameter
- In all logs from pipeline executions, the real value of the parameter will be hidden
In order to create Variable group, go to Library: 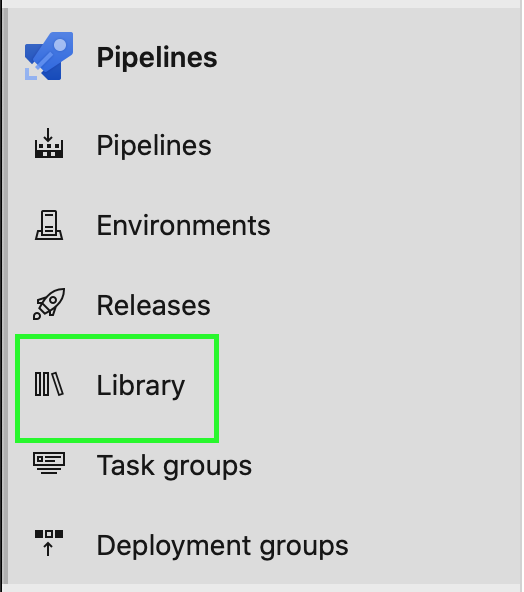 and click “+Variable group” button, set the name “terraform-sample” and add variables:
- access_key – access key for a storage account
- spn_client_secret – password for Service Principal account
Remember to set these variables as secrets, you can do this by clicking on the padlock.
Created pipeline using yml files from sources
To create a pipeline we must go to Azure DevOps. Please clone my repo (there) and upload it to Azure Repos.
Next, choose pipelines 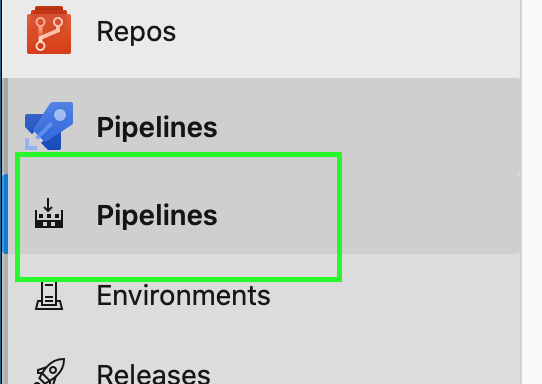 and click Create Pipeline button
As source select Azure Repos Git 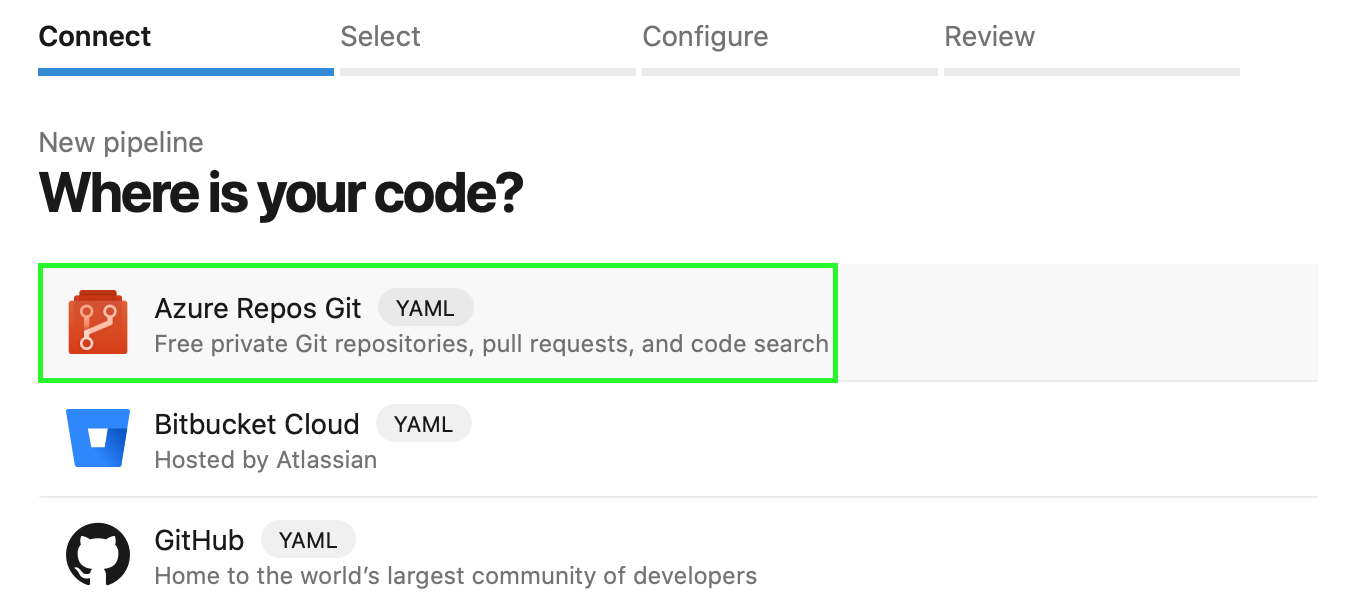 and select the repository on which you uploaded scripts from my repo.
Then choose Existing Azure Pipelines YAML file and select path: /02_Terraform_pipeline/azure-pipeline/terraform-apply.yml and click Continue. Next click the down arrow near to Run button, and select Save.
We need to connect our variable group “terraform-sample” with the created pipeline. In order to do that follow the: Edit -> “three dots” neer run -> Triggers -> Variables -> Variable groups -> Link variable group -> select “terraform-sample” group.
The pipeline consists of two jobs:
Plan job:
- Terraform plan
- Create an artifact with terraform plan
Deploy job:
- Download an artifact
- Run terraform apply for created plan
Save and queue pipeline, work is done!
As a result of the pipeline, a resource group will be created in your subscription.
In the next articles, I will show you a much more complicated terraform, cheers!